How to Repair Rotted RV Roof: DIY Tips for Success
- Get link
- X
- Other Apps
How to Repair Rotted RV Roof: DIY Tips for Success
Fixing a rotted RV roof might seem scary, but it’s doable with the right approach. A local RV service center can handle this job, but many RVers prefer to tackle it themselves. This guide walks you through each step of the repair process, from checking the damage to finishing touches. You’ll learn how to spot problem areas, gather the right tools, remove damaged parts, and seal everything properly. With patience and care, you can restore your RV roof and save money on professional repairs.
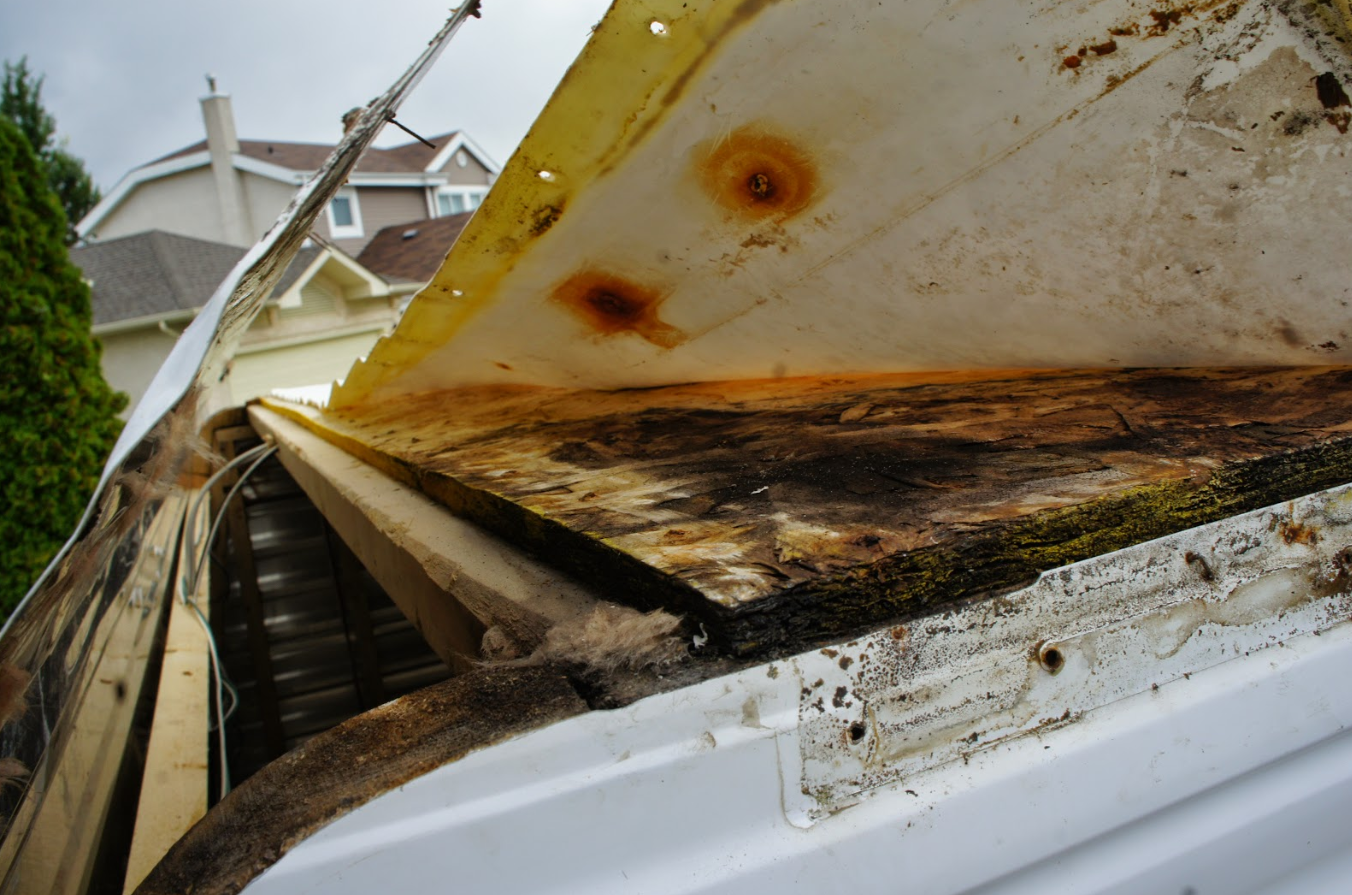
Assessing the Rotted Roof
Start by carefully looking at your RV roof to see how bad the damage is. Check the seams, edges, and openings around vents or skylights where water often gets in. Look for soft spots, dark stains, or bubbling paint – these show water damage. Use a screwdriver or similar tool to poke the wood gently. If it feels soft or spongy, the wood is rotted. Also, check for any sagging areas on the roof, which may indicate structural damage. Look for mold or mildew growth, which shows water has been there for a long time. Taking time to check everything helps you understand how much work needs to be done.
Gathering Necessary Tools and Materials
Before starting your repair, collect all the tools and materials you’ll need. Safety comes first – get gloves, safety glasses, and a dust mask to protect yourself. For tools, you’ll need a utility knife, putty knife, hammer, screwdriver, and pry bar to remove damaged sections. For materials, get wood for framing, plywood for the roof deck, roofing glue, sealant, and new roof covering. Don’t forget a tape measure, pencil, and level to make sure everything fits right. Having everything ready before you start makes the job go smoother and helps you get better results.
Removing Damaged Roof Sections
Now it’s time to remove the damaged parts of your roof carefully. Here’s how to do it safely:
- Check the Damage: Look closely at the rotted area to see exactly what needs to be removed.
- Stay Safe: Wear your safety gear – gloves, glasses, and a mask – to protect against debris and dust.
- Get Your Tools Ready: Have your utility knife, pry bar, and saw ready for the removal work.
- Work Step by Step: Cut away the damaged section in small pieces, being careful not to damage the good parts around it
Repairing and Sealing the Rotted Area
Time to fix the hole and make it waterproof again. Start by cutting out any remaining rotted wood carefully. Measure the hole and cut a replacement piece from marine-grade plywood that fits perfectly. Put waterproof sealant on the edges and bottom of the new wood piece before screwing it in place. For extra protection, add more layers of sealant on top of the new wood. Cover the whole repaired area with roof sealant or tape to make sure no water can get through. This careful approach fixes the damage and protects your RV from future leaks.
Final Inspections and Maintenance
After finishing the repair, you need to check your work and keep up with regular care. Here are four important steps:
- Check for Leaks: Look at the roof regularly for any signs of leaks or water damage. Fix problems quickly to prevent more damage.
- Clean and Clear Debris: Remove leaves, branches, and dirt that can build up on the roof and block drainage
- Check Sealant: Look at the sealant regularly and add more when needed to keep water out.
- Regular Roof Checks: Schedule routine roof inspections to catch problems early and avoid expensive repairs later
Related Topics:
- How to Seal RV Roof
- How to Repair Tear in RV Roof
The post How to Repair Rotted RV Roof: DIY Tips for Success appeared first on Patriots RV Services.
from Patriots RV Services https://ift.tt/VOIsCKB
via IFTTT
- Get link
- X
- Other Apps


Comments
Post a Comment